According to Microsoft’s documentation, you can expect permissions applied to a mailbox to migrate when you use the Microsoft’s MRS-based tenant to tenant migration service. As mentioned in the title, this includes FullAccess permissions, SendAs and folder permissions. Notably, Send on Behalf permissions are not migrated.
During the preparation steps you need to do for a T2T migration, you set the ExchangeGuid on the target MailUser to the same value as the source mailbox ExchangeGuid. You also take the source mailbox LegacyExchangeDN and stamp this on the target MailUser as an X500 address. This is not only used to correctly map the source and target objects, but it is also used to allow permissions to be reapplied when a mailbox is migrated.
During the mailbox migration, the migration service records who had delegate rights to the mailbox in the source tenant, maps those identities to their target tenant counterparts, and then reapplies those permissions onto the mailbox during the finalising stage of the migration. A key thing to note here is that permissions can only be reapplied if the delegate has also already been migrated (or a MailUser already exists with the ExchangeGuid and LegacyExchangeDN-as-X500 set) so that the migration service knows who to reapply permissions to. The process that reapplies the permissions only runs once at the end of the migration, so if someone who was a delegate on the source mailbox does not yet exists in the target, they will not get their delegate access reapplied even if they migrate later.
So, if you migrate a mailbox that has access permissions applied to it (most commonly shared mailboxes but this does apply to any kind of mailbox) you should already have the users of that mailbox migrated or at least have the MailUsers created with the correct properties set in preparation for a migration in the future. That way their delegate access to the mailbox will be set, and when the users migrate later their access to the mailbox is preserved.
A fairly new service from Microsoft, the Cross-tenant OneDrive migration allows you to migrate a users OneDrive from one tenant to another. If you wish to use this service, you need a Cross-Tenant User Content Migration license that is available for purchase to Enterprise Agreement customers.
If you have followed Microsoft’s guide to setting it up, you know the first step in the process is to create a mapping that maps the source tenant user to the target tenant user. After that, you can start the migration by running:
Hopefully when you run this command it works without any issues! However, there are a few errors that you might encounter. Here is a list of errors that I have encountered and how to resolve them:
Error -161 This means that the LockState of the users OneDrive site is set to ReadOnly. This is most likely something that an administrator set on the Users OneDrive for one reason or another. You can resolve this by setting the users OneDrive site back to Unlock and starting the OneDrive migration again.
Error -102 This means that the LockState of the users OneDrive site is set to NoAccess. This happens if the user had a OneDrive site provisioned at some point, but since then has lost the right to access it. The most probable cause for this is the user once had a license that enabled them to have a OneDrive but was then moved to a license that does include OneDrive. You can resolve this by reallocating a license to the user that includes a OneDrive (SharePoint Plan 1 or Plan 2) and starting the OneDrive migration again.
The Cross-Tenant content move feature is not enabled for this tenant Assuming you have correctly set up the trust between the two tenants, this error occurs when you have not applied a Cross Tenant User Data Migration license to the user. This can be applied to either the source or the target user, so apply one and wait a short amount of time, then start the OneDrive migration again.
OneDrive site for source user UPN example@sourcetenant.com does not exist This means the user does not have a OneDrive provisioned.
Identity map entry for source UPN example@sourcetenant.com does not exist on the target tenant This means that no mapping exists for this user on the target tenant. Create a mapping for this user and then start the migration again.
The identity map entry for source UPN example@sourcetenant.com does not correspond with the requested target UPN example@targettenant.com This means that the mapping you created is incorrect. Perhaps the Source user UPN or the target user UPN was wrong. You should try recreating the mapping, or check the existing mapping, and start the OneDrive migration again when you have fixed the mapping.
The remote server returned an error: (429) This means that your SharePoint tenant is currently being throttled due to your usage limits being exceeded. You can read more about that here, but in the end, this means you just have to try starting the migration again a bit later.
Additionally, there is one other error I have met that does not immediately throw an error but does cause the MoveState to move to Failed (usually after several hours). This is an unusual case where a user is using more space in their OneDrive than their license allows. For example, someone with a Microsoft 365 F1 license assigned which only allows 2 GB of storage in OneDrive, but with more than 2 GB of used storage (which you can check in Microsoft admin center). I expect this happens if a user originally had a license that allows more storage (such as a Microsoft 365 E3 which allows 1 TB of OneDrive storage) but was then downgraded. This situation causes the migration service some confusion as it tries and retries several times before failing.
The solution is to simply apply a license that allows more OneDrive storage and then start the migration again.
Since November 2022 Microsoft requires that you purchase a Cross Tenant User Data Migration license in order to use their cross tenant migration services for Exchange or OneDrive. But there is very little information about this license type available online. Here are the basic details for this license type for anyone who is curious:
But you get the following error: “This mail enabled user cannot be permanently deleted since there is a user associated with this mail enabled user in Azure Active Directory. You will first need to delete the user in Azure Active Directory. Please refer to documentation for more details.”
Oh… okay then. So you remove the user in Microsoft Entra ID (Azure AD) and also make sure it has been removed from Deleted users. Now you try to remove the MailUser in Exchange Online again, this time running:
But now you get a new error: “Unable to permanently delete mail enabled user. The mail enabled user has litigation hold or In-Place hold applied on it. Please remove the hold before trying to delete”
This is probably due to a default policy that is applied to all UserMailbox / MailUser objects in your organisation. Not a problem… except, how do you remove litigation hold / in-place hold from an object that is now soft-deleted? Especially considering that you cannot restore it because you already deleted the user in Entra ID.
Thankfully the answer is fairly straightforward, just not completely intuitive in my opinion. Run the following command:
This guide follows the official guide from Microsoft (which can be found here) with each step shown in more detail and more screenshots to help you validate what you’re doing. This sort of work should be done by experienced Office 365 administrators, however this guide could also be used by people looking to learn (say, by migrating mailboxes between two test Office 365 tenants).
It is also worth highlighting that at the time of writing, this feature is in public preview, meaning you should test it and ensure that the process works correctly for you before committing to using it in a fully-fledged mailbox migration project.
You will need to set aside at least a few hours to follow this guide all the way through. The process uses a combination of configuration in Azure and Exchange Online PowerShell.
I also recommend having a OneNote (or other note taking app) page ready to paste various GUIDs and notes throughout this process.
Preparing the target tenant (where the mailboxes will be migrated to)
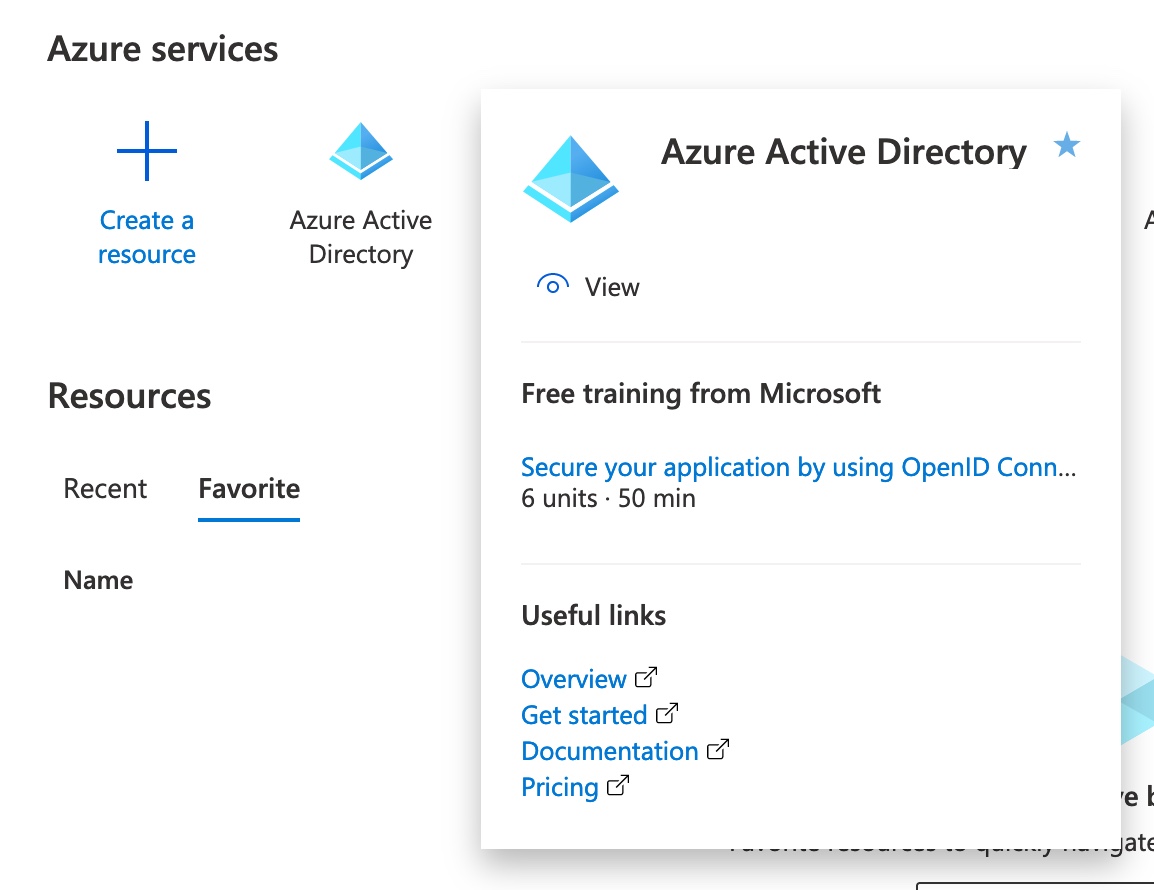
Go to the Azure Portal and log in if needed (using target tenant credentials). Click on Azure Active Directory.
On the Overview page make a note of your Tenant ID. In your notes make sure this is clearly labelled as the target Tenant ID as you’ll be making a note of the source Tenant ID later.
On the left click App registrations, then click + New registration.
Give the app a descriptive name (such as “CrossTenantMailboxMigrationApplication”) and under Supported account types select “Accounts in any organizational directory (Any Azure AD directory – Multitenant)”. In the Select a platform drop down select Web and enter “https://office.com” in the box next to it.
Click register at the bottom of the page.
You should be taken to the Overview page for your new app, but if not, from the Azure Active Directory page click on App registrations on the left and click on your app to bring up the overview.
You need to note down the Application (client) ID here as this will be used later to create URL that will be used to register this app in the source tenant.
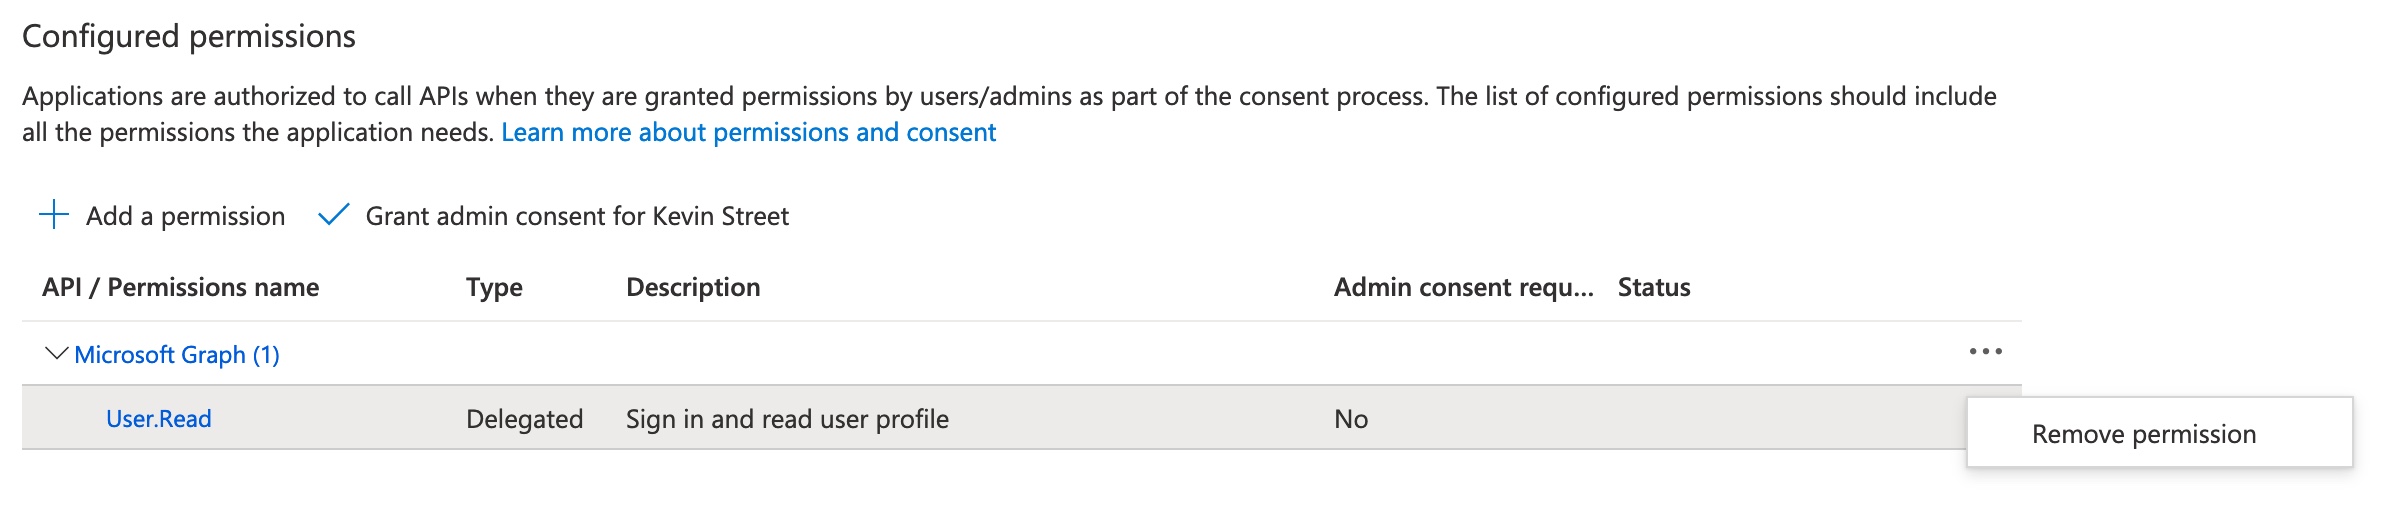
On the left, click on API permissions. By default, the permission User.Read will be granted, however this is not needed so remove it by clicking on the three dots at the end of the line and selecting Remove permission. Confirm this by clicking Yes, remove in the pop-up warning that appears.
Now to add the permissions that are needed, click + Add a permission. In the menu that appears on the right, click on the APIs my organisation uses tab and search for Office 365 Exchange Online.
Click on Office 365 Exchange Online and select Application permissions. Expand Mailbox and select Mailbox.Migration. Then click Add permissions at the bottom of the screen.
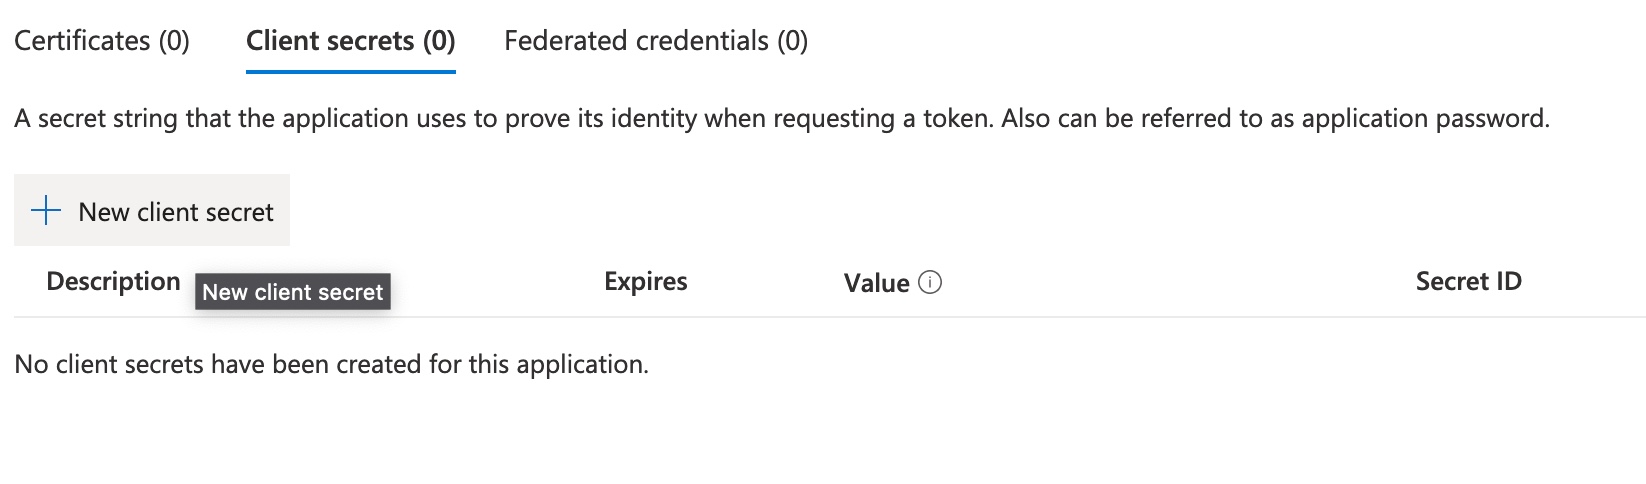
Next, click on Certificates & secrets on the left. Make sure you’re in the Client secrets tab and click + New client secret.
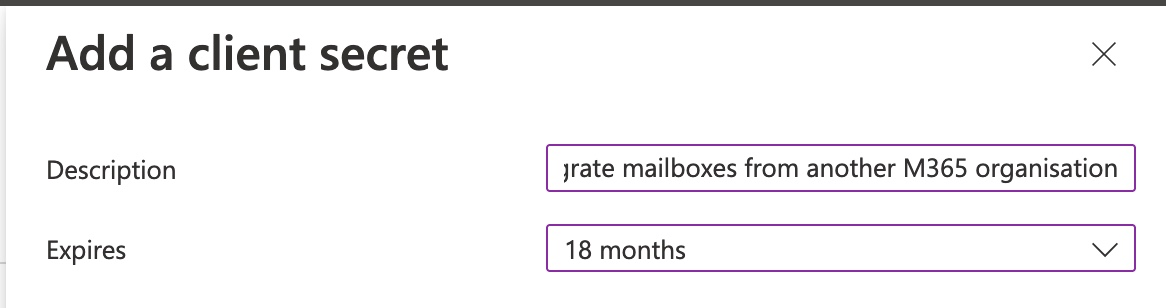
Give the secret a description (such as “Used to migrate mailboxes from another M365 organisation”) and an expiration date. This secret should remain valid for the duration of your mailbox migration project (or you’ll need to create a new client secret later when this one expires). Click Add at the bottom of the screen.
Make a note of the data in the value field; this is the client secret. You should endeavour to store this somewhere secure as it is a secret and should not end up the wrongs hands. This is also your only chance to store the secret as it will not be visible on this page on future visits.
Don’t worry, the secret that is visible here has been deleted before publication!
Now you must consent to the permissions you granted the application a few steps ago. To do this go back to the Azure Active Directory landing page by clicking Microsoft Azure in the top left corner of the screen and then select Azure Active Directory. From there, click on Enterprise applications on the left and then click on the application you created. On the left, select Permissions and then click Grant admin consent for [your tenant name].
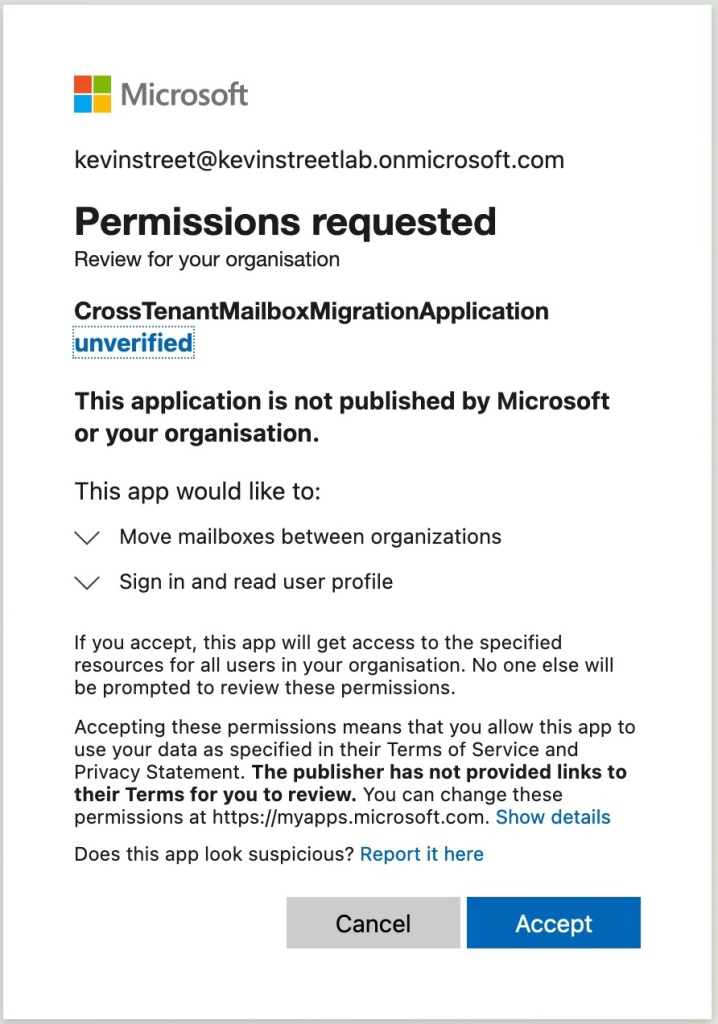
A new browser window will pop up and you may be required to re-enter your account password. A Permissions requested box will follow on from that and you should review the permissions and click Accept.
Now, if you click Refresh at the top of the screen you should see the Office 365 Exchange Online – Mailbox.Migration permission granted.
Next it is time to formulate the URL that will be used to register this application in the source tenant. The URL template is:
sourcetenant = The onmicrosoft.com domain for the source tenant (where the mailboxes are migrating from). If you need to find out the onmicrosoft.com address for the source tenant, go to the Azure Portal -Domains page and log in with your source tenant admin credentials – be careful here as you may already be logged in with your target tenant credentials at this stage due to the work you’ve just been doing in Azure. Use an Incognito window to make sure you switch accounts to be certain. Amongst the listed domains will be a something.onmicrosoft.com domain – this is what you need. application_id = The Application (client) ID you noted down earlier.
In my environment my source tenant is kevinstreetlab.onmicrosoft.com and my Application (client) ID from the application I created is af9aed61-522c-4f94-b5b1-f415b6c6d5a1, so my URL is:
sourcetenant = The onmicrosoft.com domain for your source tenant (where the mailboxes are migrating from). This is the same as you used earlier when formulating the URL. endpoint_name = Any descriptive name you want for this endpoint (I used “MailboxMigrationEndpoint”).
The last bit of preparation to do in the target tenant is to create an organisation relationship between your source tenant and your target tenant.
First you need to log on to Azure in your source tenant to make a note of the source tenant ID.
Go to Azure Portal and log in if needed (source tenant credentials). Click on Azure Active Directory.
On the Overview page, make a note of your Tenant ID. In your notes make sure this is clearly labelled as the source Tenant ID so that you do not confuse it with the target Tenant ID that you noted down earlier.
Create the following variable:
$SourceTenantID="source_tenant_id"
source_tenant_id = The source Tenant ID that you just noted down.
Run the following two commands to see what existing organisation relationships exist (and particularly if any already exist for the same tenant):
organization_relationship_name = Any descriptive name of your choosing (such as “OrgRelationshipForMailboxMigrations”).
That’s it for the target tenant preparation.
Preparing the source tenant (where the mailboxes will be migrated from)
Now we move on to the preparation needed in the source tenant. If you are still logged in to the target tenant, you may prefer to log out to minimise the possibility of confusing which tenant you are working in.
Open your web browser and navigate to the URL you formulated earlier so that you can accept the migration application in the source tenant.
If you are asked to sign in, make sure you sign in with your source tenant admin account. You will be prompted to accept the permissions needed to use the migration app so click Accept to continue.
If you want to confirm the app has been registered, go to the Azure AD Portal, and select Enterprise applications from the left and confirm that the CrossTenantMailboxMigrationApplication appears in the list (or whatever name you chose).
For the next steps you need to connect to your source tenant through Exchange Online PowerShell. Start by disconnecting from the previous session:
Disconnect-ExchangeOnline
Press Y to confirm you want to disconnect from all active sessions. Now connect to your source tenant:
Before we can create the organisation relationship, we need to create a scoping group for the mailboxes that will be allowed to migrate. The idea here is that you add mailboxes to this group if they are allowed to migrate, which helps to protect mailboxes in your organisation that may not be migrating. To create the group, run the following command:
New-DistributionGroup -Type Security -Name "Mailboxes for Migration" -Alias "MigratingMailboxes"
You can choose anything for the Name and Alias fields. This will be a mail enabled security group so the value in the Alias field will become the email address that is created for this group.
We’ll add a mailbox to this group later when doing a test migration.
Now we’re going to create the organisation relationship in the source tenant, just like we did in the target tenant earlier. Run the following commands:
target_tenant_id = The target Tenant ID you noted down earlier. application_client_id = The Application (client) ID that you noted down earlier. scoping_group_name = The value you used for the Name of the scoping group you created earlier.
Run the following two commands to see what existing organisation relationships exist (and particularly if any already exist for the same tenant):
organization_relationship_name = Any descriptive name of your choosing (such as “OrgRelationshipForMailboxMigrations”).
This completes the preparation steps for both tenants and the next section will cover migrating a single test mailbox.
Migrating a mailbox from the source tenant to the target tenant
For any mailbox migrating to the target tenant, you must provision a MailUser object in the target tenant and assign it some very specific attributes that are gathered from the user’s mailbox in the source tenant. Specifically, you will need the ExchangeGUID value, the ArchiveGUID value (if the user has an Online Archive), the LegacyExchangeDN value and any x500 addresses already configured on the mailbox.
In this guide I am going to migrate one mailbox over, a pretend user called Alex Wilber. His primary email address will change from AlexW@dev.kevinstreet.co.uk to AlexW@kevinstreet.co.uk as his mailbox migrates from my dev/lab tenant to my production tenant.
To follow along select or create a test user and mailbox in your source Office 365 tenant.
The first thing to do is to add this mailbox to the scoping group that we created in the source tenant preparation. Start by logging in to your source tenant in Exchange Online PowerShell and run the following command:
mailboxes_for_migration = The name of the scoping distribution group you created. mailbox_alias = The alias of the mailbox you wish to migrate. If you do not know the alias, you can get it in PowerShell by using the following command:
Get-Mailbox -Filter { EmailAddresses -eq "user_email_address" } | Select-Object Alias
user_email_address = One of the email addresses assigned to the user.
With that done, it’s time to collect the information we need for the MailUser. Run the following command to get the information we need:
mailbox_alias = The alias of the mailbox you are migrating.
Make a note of the ExchangeGUID, LegacyExchangeDN and any existing x500 addresses in the EmailAddresses field. Also, if the ArchiveGUID has a value (other than 00000000-0000-0000-0000-000000000000) this means the Online Archive is enabled for the user and you should make a note of this value as well.
With these values gathered it’s time to create the MailUser in the target tenant. Disconnect from the current Exchange Online PowerShell session and re-connect to your target tenant.
When creating a MailUser you will need to assign it a password, so use a password generator or something similar to create a password you will use, and assign it to a variable with the following command:
Where the following value are: alias = The alias for this MailUser. This could be the same as the alias that is used in the source tenant. displayname = How the display name will appear for this user. This could be the same as the display name that is used in the source tenant. firstname = The users first name. lastname = The users last name. primary_smtp_address = This is the main email address that the user will have after they have migrated (this must use a domain that is registered in the target tenant). external_email_address = This is the email address that the user has in the source tenant. It must be prefixed with SMTP:. microsoft_online_services_id = This will be the UPN for the user and is most likely the same as the users primary_smtp_address.
Your organisation may have guidelines that are followed to assign values such as alias and display name, so you should follow those as required.
For my test user Alex Wilber that looks like this:
Now that the MailUser has been created we need to edit it to assign the values that we collected from the user in the source tenant. First let’s see what values are currently set:
alias = The alias of the MailUser you just created.
You should see that both ExchangeGUID and ArchiveGUID are set to 00000000-0000-0000-0000-000000000000. These values need to be identical to the values the user had in the source tenant. If your user didn’t have the Online Archive enabled in the source tenant, then there is no need to set this in the target tenant.
To set the ExchangeGUID, use the following command:
archive_guid = The users ArchiveGUID that you noted down earlier.
If you re-run the Get-MailUser command from a few steps ago you will now see the ExchangeGUID (and perhaps ArchiveGUID) are set to the same values that the user has in the source tenant.
The next thing that needs to be done is the LegacyExchangeDN that you noted down for the user needs to be added as a x500 proxy address to this MailUser. This is done by prefixing the LegacyExchangeDN value with x500: and adding it to the EmailAddresses value on the MailUser.
For example, the LegacyExchangeDN I noted down for my test user was:
/o=ExchangeLabs/ou=Exchange Administrative Group (FYDIBOHF23SPDLT)/cn=Recipients/cn=93531982d8b14ac389c31f982281535d-AlexW
So, this will become:
x500:/o=ExchangeLabs/ou=Exchange Administrative Group (FYDIBOHF23SPDLT)/cn=Recipients/cn=93531982d8b14ac389c31f982281535d-AlexW
alias = The alias you chose for the MailUser. legacy_exchange_dn_x500 = The x500 address you just created just now.
In addition to adding this address, you also need to ensure the user has a @targettenant.onmicrosoft.com email address. This usually takes the form of alias@targettenant.onmicrosoft.com (you can find the onmicrosoft.com domain for your target tenant in Azure AD or in the domains sections of your Office 365 portal).
If the MailUser does not already have one of these set, set it now:
Finally, you need to re-add any x500 addresses that the user already has set in the source tenant. These can be found in the EmailAddresses field and are prefixed with x500:. There’s a good chance there won’t be any, but if there are you should copy them and add them with the same Set-MailUser command used to add the previous 2 addresses.
Now re-run the following command to check that all the fields look correct:
endpoint_name = The name of the migration endpoint you created during the target tenant preparation (if you need to remind yourself what it was called run the command Get-MigrationEndpoint and take note of the identity value). migrating_user_smtp = The email address of the user who is migrating (this must be their new email address in the target tenant).
That’s it for the mailbox preparation and it is now time to migrate the mailbox.
Migration time!
Migrations are initiated and managed from the target tenant. In Exchange Online PowerShell connect to your target tenant (if you aren’t already). Next you need to create a simple CSV file with one header: EmailAddress. Then below that enter the primary SMTP address of the migrating user in the target tenant.
Note: There are other headers that you can add to the CSV if you wish and these are detailed in this article. However, EmailAddress is the only mandatory header. In this guide I am only migrating 1 user however you can have up to 2000 users per batch.
Save this CSV somewhere on your computer.
Now run the following command to create the migration batch:
migration_batch_name = You can choose any name for the batch. This could be “AllFinanceUsers” or just “Migration_20102022” – whatever works for you. endpoint_name = The name of the endpoint you created in the target tenant preparation. path_to_csv = The path to the CSV you created. targettenant.onmicrosoft.com = The onmicrosoft.com domain for your target tenant.
Now that you have created the migration batch, you can start it when ready. This will begin the sync of the mailbox to the target tenant, and it will reach 95% and then stop. Every 24 hours it will automatically do a delta sync to keep the mailbox at 95% until you are ready to complete the cutover. This will not affect the user and is a good way to get entire groups of users sync’d and ready to cutover in a single evening depending on your migration project plans.
Once the status moves to Completed the user will no longer be able to open their mailbox in the source tenant and should be able to open it in the target tenant!
Now that the migration has completed, the MailUser has converted to a UserMailbox and it has entered a 30 day grace period where it will work without a license. You should assign a license now or before the 30 days expires to avoid disruption to the user.
You should read the documentation for the New-MigrationBatch, Start-MigrationBatch and Complete-MigrationBatch commands to fully utilise them. For example, on the New-MigrationBatch command you can use the -AutoStart switch on so that it starts the sync immediately, and the -CompleteAfter switch to specify when it completes (removing the need to use Start-MigrationBatch and Complete-MigrationBatch separately).
If you have not read it before now, you should read the main article from Microsoft about this feature to learn about the limitations and gotcha’s. For example, if any user has an auto-expanding archive set their mailbox cannot be migrated using this tool. The FAQ on the Microsoft page answers many questions you may have and covers limitations and known issues with the tool.