Implementing Ivanti Patch for SCCM (Part 1): Introduction, Planning and Installation
Implementing Ivanti Patch for SCCM (Part 2): WSUS Code Signing Certificate
Implementing Ivanti Patch for SCCM (Part 3): Ivanti Settings
Implementing Ivanti Patch for SCCM (Part 4): Publishing a Third-Party Update
Implementing Ivanti Patch for SCCM (Part 5): End-to-end Demonstration
In Part 4 of this guide we will create the service account that Ivanti will use to run scheduled tasks and publish our first third-party update to into WSUS to deploy with SCCM.
Ivanti Service Account
When you configure third-party updates, Ivanti creates scheduled tasks that need to run under an account with permissions to publish updates into WSUS (we will go over this in the next section). While you can follow the process of publishing third-party updates with your own account, it is not considered good practise. Instead, you should create a service account for Ivanti to use and ensure it only gets the permissions needed to do its job (in line with the principle of least privilege for service accounts).
In this case, the service account will need the following permissions:
- Log on as a batch job on the server you run Ivanti on*
- Be a member of the Administrators group on the WSUS server
- Be a member of the WSUS Administrators group on the WSUS server
- In SCCM, the account must be a full administrator with the security scope set to all
*This is an important point. The scheduled tasks will be created on the server you run Ivanti on, which may not be your WSUS or SCCM server. This may be okay if you run Ivanti from a management server, or the SCCM itself, that will be on 24/7. However, if you have been running Ivanti from your own workstation up to now, you may need to switch over to a server.
The first 3 requirements can be met by configuring the account in group policy or by manually configuring the account on the servers.
To configure the account as a full administrator with all security scopes in SCCM, open the SCCM console and navigate to Administration > Security > Administrative Users and click Add User or Group in the ribbon. Click Browse and find your Ivanti service account. Click Add and tick Full Administrator from the list of available security roles. Finally, select All instances of the objects that are related to the assigned security roles.

Alternatively, you can create a security group in Active Directory and assign that full administrator rights in SCCM in the same way, and then add your regular user accounts and the Ivanti service account to that group.
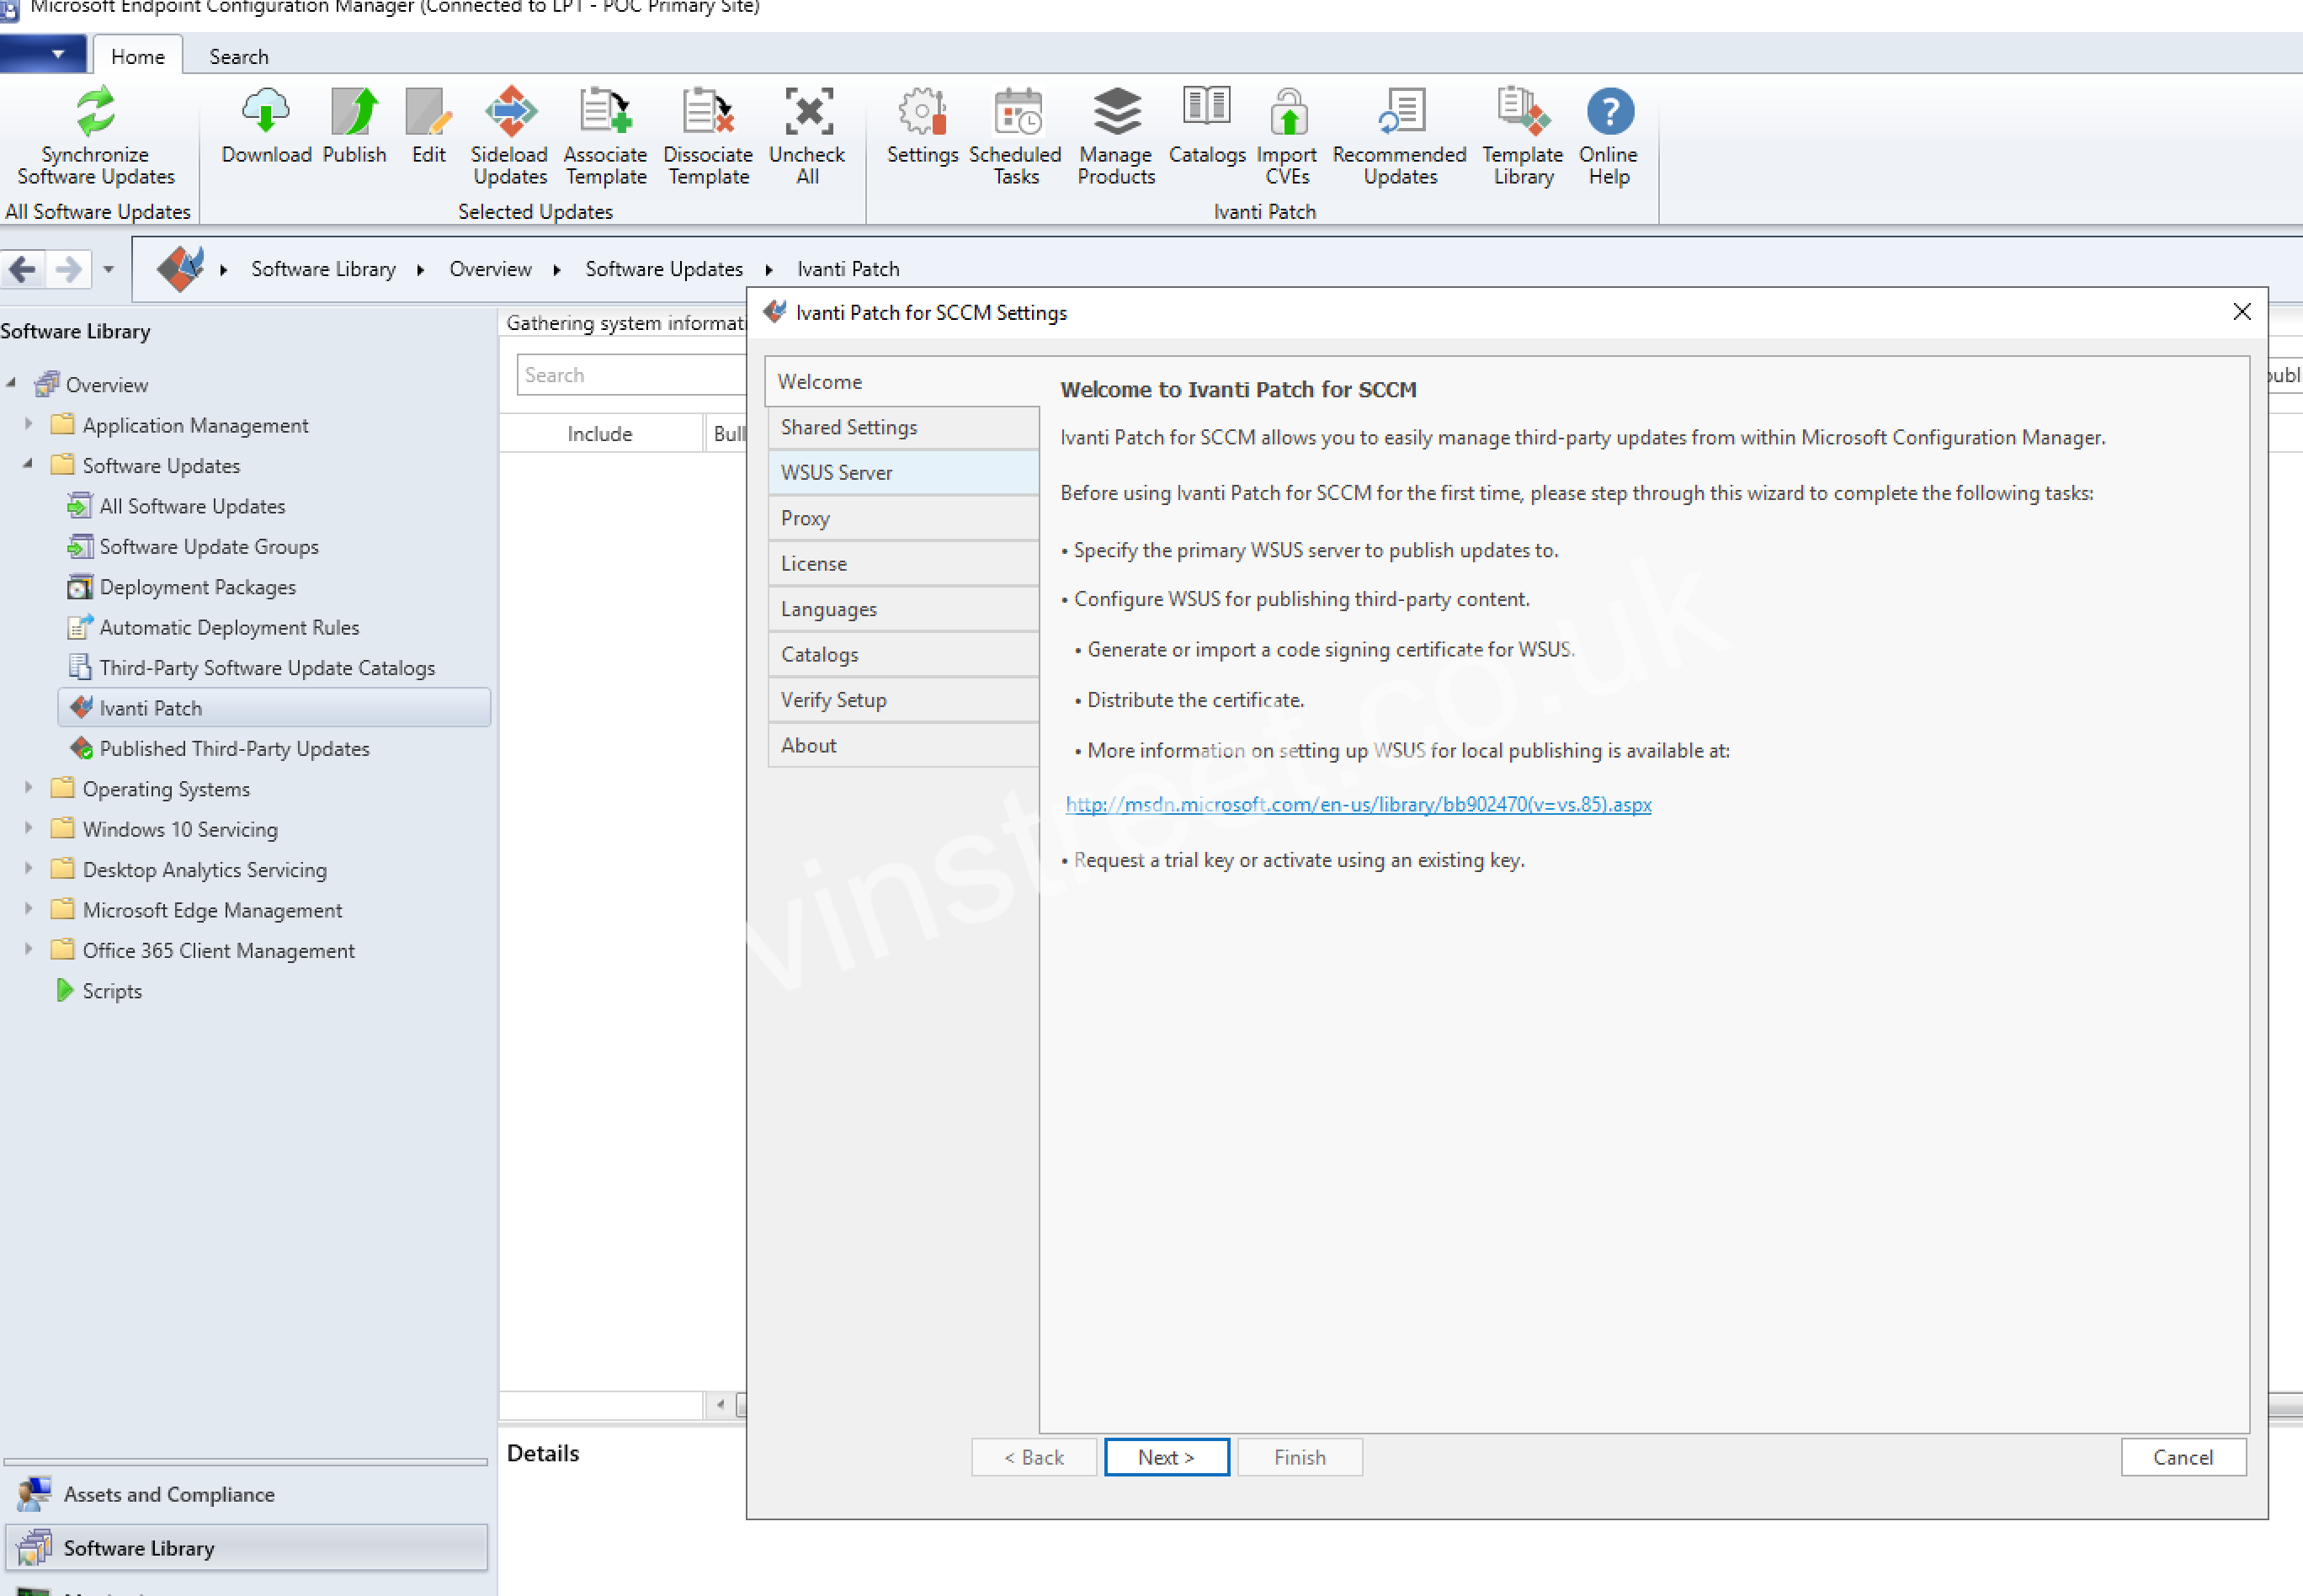
To test that your service account has all the access it needs, open the SCCM console and navigate to Software Library > Software Updates > Ivanti Patch and click on Settings in the ribbon. Go to the Verify Setup tab and click Launch Configuration Checker. In the testing tool, change the username to the username for your service account and enter the password. Click Start and review the results of the test. If anything comes back as red, review your settings and correct as needed. Hopefully it will all come back green!

Publishing a third-party update
At last, let’s get a third-party update published into WSUS and deployed with SCCM.
The first thing to do is to create a smart filter for the product you want to patch. This will reduce the large list of available updates down to just the one you need. Ideally you should create smart filters for each product you want to patch, rather than using a single filter for all products. This gives you more granular control over the updates for each product.
Let’s create one for Google Chrome. Start by opening the SCCM console and navigating to Software Library > Software Updates > Ivanti Patch. In the search bar, search for Google Chrome and scroll down to until you find the Google Chrome updates.

Click on the New SmartFilter button to begin.

In the Select scope section, be sure to click Shared. This will store this smart filter in the database and make it visible to anyone else who administers Ivanti. Give the filter a name such a Google Chrome and change the rule matching from any to all.
In the rule, change the first field to Product and ensure the next rule is set to contains. Enter the value Google Chrome in final field. Then click + Add rule and this time set the first field to Is Superseded, the second field should be Does not contain and the final field should be Yes.

This creates a smart filter that will find updates for Google Chrome that are not superseded. Click Save and the results will be displayed.

Now that the smart filter has been created, click on Scheduled Tasks in the ribbon. Using scheduled tasks, new updates that match the results of the smart filter can be published on a regular schedule. Click Create new task and give it a name, such as Google Chrome. Choose what schedule you would like this task to run. Bear in mind that this is the schedule that new updates will be published into WSUS, not the schedule that they will be deployed to users. That will be handled by an Automatic Deployment Rule in SCCM later. I would recommend making these run once a week in the evening (perhaps on a Tuesday so the latest third-party updates get published into WSUS at the same time as new Microsoft updates on Patch Tuesday).
Tick Publish the updates selected by this filter and select your Google Chrome filter from the drop down list. You do not need to add the updates to a Software Update Group as that will also be handled later by the Automatic Deployment Rule. Finally, make the task run as a Different user by selecting the radio button and enter the credentials for your Ivanti service account.

Click OK to save this new task. Now open Task Scheduler (the Windows one) and expand Task Scheduler Library > Ivanti > Patch. You will see the task listed here! Select the task and click run to test that it is working. When it is running, quickly switch back to the Ivanti Patch interface in SCCM and select your Google Chrome smart filter. Watch as the status updates to downloading…

packaging…

publishing…

and finally published.

Next you need to synchronise the updates between WSUS and SCCM. This is done by clicking Synchronise Software Updates in the ribbon. The progress of this can be monitored using the wsyncmgr.log file on the SCCM server.
When the sync is complete, you need to subscribe to this product in SCCM. This only needs to be done the first time you sync after adding a new product. In the ribbon, click Manage Products and select the vendor – Google Inc in this case. Click Subscribe and wait for the status to change to Subscribed.

Once that is done, close the Manage Products window. Now synchronise the updates once again and wait for it to complete. If you are keeping an eye on wsyncmgr.log you should see the following lines about new patches being sync’d:

Great! Now you can go to the All Software Updates node and search for Google Chrome. These two patches should appear.

Now that the Google Chrome updates are in SCCM, all you need to do is follow the same process you would for a Windows update. Create an Automatic Deployment Rule and a schedule to deploy this to clients. Let’s create a new ADR for Google Chrome, to publish the updates on the second Wednesday of every month (the day after the Second Tuesday patches are released by Microsoft).
In the SCCM console go to Software Library > Software Updates > Automatic Deployment Rules. Click Create Automatic Deployment Rule and give it a name such as Google Chrome Monthly Updates. Specify a collection that contains your clients, and make sure the rule adds updates to an existing Software Update Group each time it runs. Click Next and Next again.
On the filters list, tick Product and Superseded. For Product, select Google Chrome among the list of products and for Superseded select No. Click Preview to see a list of updates that the ADR will deploy.

Click Next and select to run the rule on a schedule. Customise the schedule and select that it should run monthly, on the second Wednesday of the month.

Click OK to accept the schedule and click Next. Decide when you want the updates to become available (typically immediately after they are deployed) and when you want the installation deadline. On the next screen, decide if you want the updates to appear in Software Center or not, and what clients should do when the deadline is reached.
Continue through the wizard, selecting a deployment package to add these updates to (or creating a new one) and finally complete the wizard. If you’re ready to get the patches out right now, select the new ADR and click Run Now. This should cause the Google Chrome updates to be added to the Software Update Group and the Deployment Package, and any clients in the collection you targeted while creating the ADR should receive the update soon!
You are now ready to deploy third-party updates to clients in your organisation. In the final part of this guide we will patch Google Chrome, Adobe Reader DC and Power BI Desktop using Ivanti on a client currently running out of date versions of each of them!